If you’re driving in the evening and your headlights begin to fade, it may be time to replace the bulbs. While you could bring your car to a mechanic, changing your own headlights can help you save money and teach you about car maintenance. Although it seems daunting, replacing your headlights is something you can do in your driveway with minimal preparation. Here’s how to navigate the process and get back on the road with clear and bright headlights.
The Importance of Changing Your Headlights
Maintaining optimal visibility on the road keeps you and your fellow drivers safe, especially in low lighting. Over time, headlights can dim, burn out, or get damaged, which lowers your ability to see and be seen at night and in bad weather. Regularly replacing your headlights helps prevent accidents and enhances everyone’s driving experience.
When to Replace Your Headlights
Dimming, flickering, or a complete outage are clear indicators that it’s time to replace your headlights. If only one headlight fails, replacing both headlights is recommended to make sure they illuminate evenly.
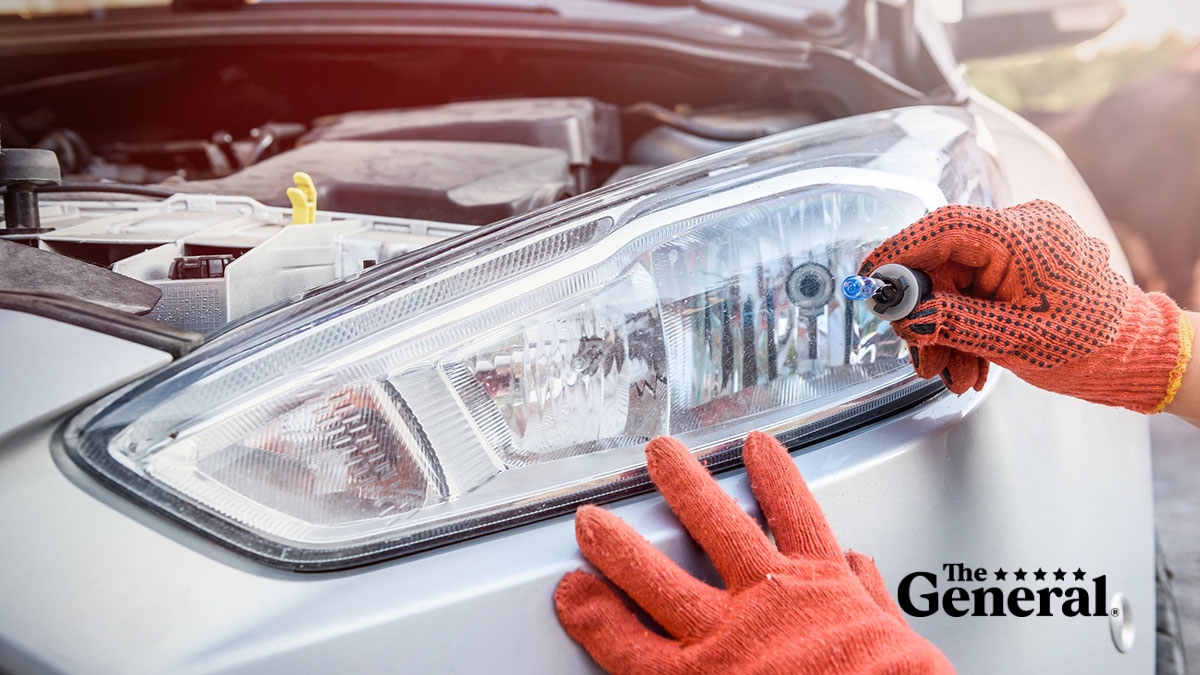
What You’ll Need
Before you begin, grab these basic tools and supplies:
- The correct headlight bulb for your vehicle
- Gloves to prevent the oil on your skin from damaging the bulb
- Screwdriver or wrench (depending on your car’s assembly)
How to Replace Your Headlights in 6 Steps
Replacing your vehicle’s headlight bulbs might seem daunting at first, but with the right tools and a little patience, you can accomplish the task quickly. Before you start, turn off your car, remove your keys from the ignition, and park on a flat surface. Safety goggles are optional but recommended.
1. Locate the Headlight Bulb
- Open your car’s hood and locate the back of the headlight using the screwdriver or wrench.
- If needed, remove the battery, air filter housing, or other components to access the bulb.
2. Remove the Old Bulb
- Find the power wires that are clipped or screwed onto the bulb’s base and disconnect them.
- Carefully remove the old bulb. For most vehicles, you’ll either need to twist it counterclockwise or unclip a retaining clip.
3. Install the New Bulb
- Wearing gloves, insert the new bulb into the socket. Make sure it’s secure and properly aligned.
- Reconnect the power wires.
4. Test the New Bulb
- Before reassembling everything, turn on your car and headlights to ensure the new bulb works.
- If it illuminates, proceed to the next step. If not, double-check your connections and the bulb’s orientation.
5. Reassemble Everything
- Replace any removed components.
- Check that everything is tight and secure.
6. Monitor Your Headlights
- Regularly check your headlights for signs of wear or failure to keep your vehicle safe and functional.
Regularly checking your headlights is just one part of responsible car ownership. In addition to car maintenance, securing quality car insurance helps protect your investment in your vehicle. If you’re looking for an affordable policy, get a car insurance quote in under two minutes from The General.